HubSpot All-In One Marketing is a plugin for WordPress that lets you add forms, live chat and an integrated CRM to your WordPress sites. This plugin can integrate with a larger suite of marketing, sales and support tools or work on its own just for forms or live chat.
HubSpot is a big name in the software world and makes high quality SASS services outside of WordPress. This plugin helps integrate their services with WordPress sites.
The plugin does require you to setup a free account with HubSpot. There are also paid upgrades that let do things like remove the HubSpot logo or add conditional logic to your forms.
Why and When to Use HubSpot Forms
There are a few instances when you would want to use the HubSpot forms for WordPress. The first two are simply if you would want to easily add forms or live chat to your site. The added bonus to using this plugin from HubSpot is that all of the contacts from your forms and live chat will get added to a common CRM that you can access from your WordPress admin area and from Hubspot directly.
Another reason you may want to use this plugin is if you are already using other HubSpot services and want your WordPress site to capture leads for their other sales, marketing and support tools.
A benefit of the HubSpot All-In One Marketing plugin is that it uses the ultra reliable HubSpot email delivery service. Most WordPress form plugins rely on the hosting server to send emails. This is historically unreliable. Most popular WordPress form plugins suggest using paid, third party services to handle sending form submission emails. With this plugin from HubSpot you do not have to worry about this problem.
Since all of the form, chat and CRM submissions go through the HubSpot servers, this tool works great for static and headless WordPress sites. The data is stored in the HubSpot databases, so you do not need to write complex code or worry about how to save the data from your user interactions back into the WordPress database. And since you can still access all of your data from the WordPress admin area, you have the best of both worlds.
There are some times when it might not make the most sense to use HubSpot All-In One Marketing. First, you cannot extend their forms through 3rd party plugins. If you have a certain type of custom form field that you know you need, but is not supported, then this service may not work.
Pros & Cons at a Glance of Hubspot Forms for WordPress
Some of the pros of using include the following:
- Free option
- Intuitive and beautiful form builder
- Great live chat options and integrations
- Sends email via HubSpot email service
- Stores data in HubSpot servers (great for static and headless)
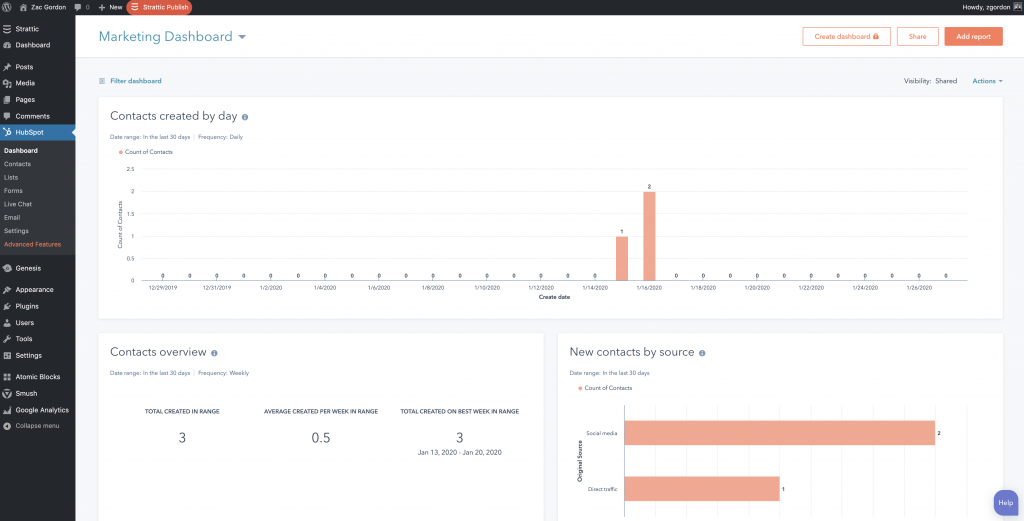
- Beautiful dashboard and reports
- Ability to export all your data
- Great built in support
- Ability to integrate forms with 3rd party services

The HubSpot Dashboard has great visual reports on the actions around your forms
Here are a few of the cons of Hubspot Forms with WordPress:
- Need to pay to remove logo (or add custom CSS)
- Default notification emails are difficult to customize (must setup transactional emails)
- Some custom fields are not possible
Despite some of the cons, overall, Hubspot forms are a great solution for static and headless WordPress sites.
How to Setup HubSpot Forms on Your Site
To setup HubSpot forms on your WordPress site you want to follow these simple steps:
- Install the HubSpot plugin
- Setup a free HubSpot account
- Design the form
- Add the form to your site
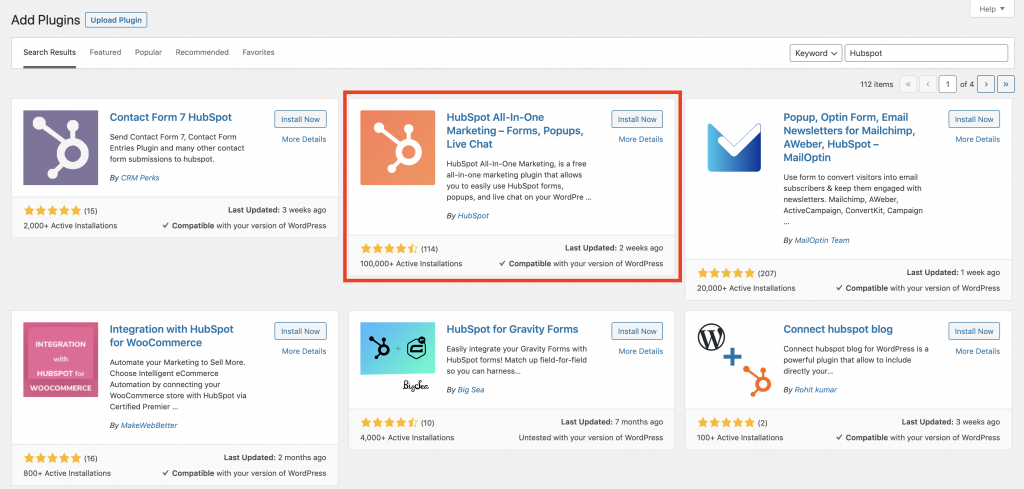
To install the HubSpot plugin start in your WordPress admin area and go to Plugins > Add New and search for the “HubSpot All-In-One Marketing – Forms, Popups, Live Chat” plugin.

Install and activate the plugin.
Next you are going to want to sign up a free HubSpot account, which you can do through the admin area. The plugin will walk you through this process.

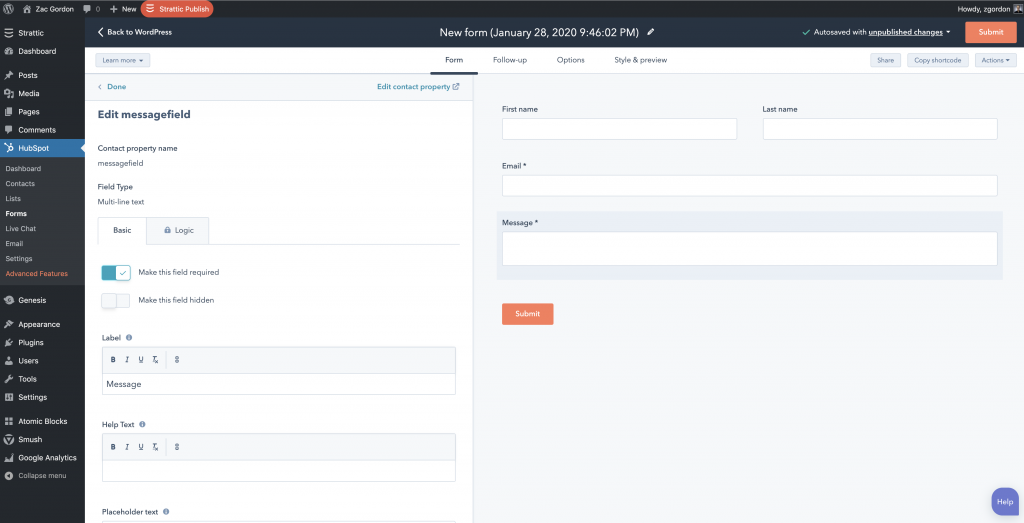
Now we can come in and design our forms. Navigate to HubSpot > Forms and click on “New Form” and select a “Regular Form.” You can choose from an existing template or just select “Blank Form.”
You can now intuitively design your form using whatever fields you need. Each field also has settings such as making the field required.

Once your form is created you can navigate to “Options” in the top navigation to determine what should happen when a user submits the form. You can also give the form a name in the top bar and click “Submit” in the top right when you are done.
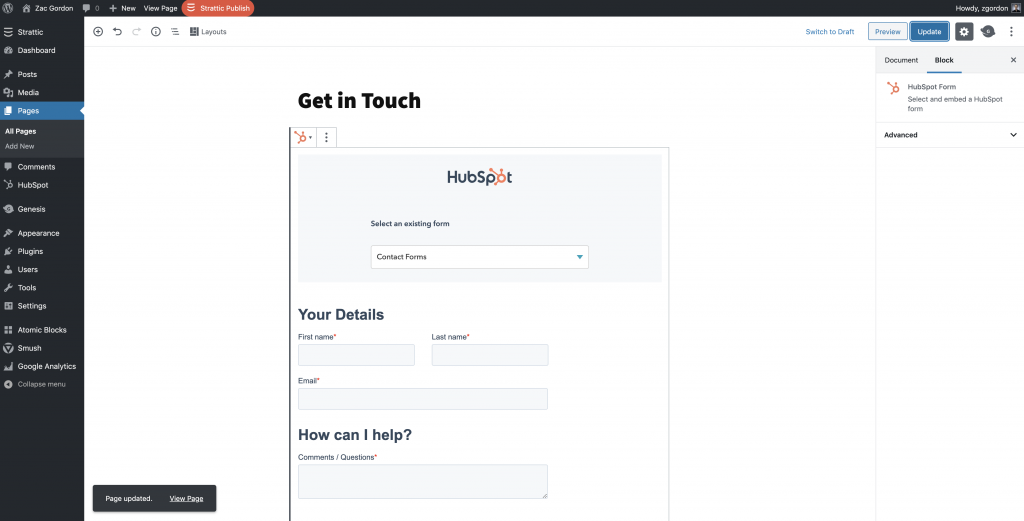
Now you can add your form to a page (or post)! Simply navigate to the page and add the HubSpot form block, select your form and you’re done!

You should find this process fairly intuitive. If you get stuck along the way, HubSpot has plenty of documentation for support as well as a chatbot right in the HubSpot admin area that can help direct you towards resources.
However, your form is now setup and you will receive an email notification if anyone submits your form.
Summary
HubSpot is a great service for static and headless forms. They also have some other great services, like free live chat and a full suite of other CRM marketing and sales related tools.
There is also plenty more you can do with HubSpot forms, such as designing popup, or slide in forms that collect emails and other information. You can also easily integrate your forms with email services like MailChimp and others via the HubSpot API.
If you haven’t tried HubSpot forms yet and are in the market or doing research on form plugins for your static or headless WordPress site, we highly recommend checking out their services.
If you need help with your Strattic site and HubSpot, our support team is here to help you as well!
Using HubSpot? Let us know below how they are working for you!


